Greetings, fans! I'm here to announce that in the coming weeks/months I will be making some (hopefully) regular posts, covering some of the really cool people I get to hang out with and go flying with throughout the year. We have a really awesome community of photographers and pilots, always working together to have a great time, and share our love of aviation with those around us, and what I want to do is provide some interviews of these folks to truly show that anyone with an interest in planes can make their goals come true.
So, here's the plan: I'm starting a program I call "Pacific Northwest Aviation Profiles" where I will interview folks (both on "paper" and on video) having anything to do with aviation. I want to have pilots, mechanics, engineers, air traffic controllers, photographers, and everyone else who is involved in aviation in some way. As I mentioned, I will post the written version of the interview here first, and then at a later time I will conduct a video interview of that same person, asking similar questions to what you see in the, but with more in-depth follow ups. I will create a new Playlist called "Aviation Profiles" on my Channel.
There you have it, that's the tentative plan. If you have any questions you would like to see answered, please leave a comment either here or on my Facebook Page.
And as always, thank you for stopping by and visiting! Be sure to visit my Fund Raising Page to stay up to date on my funding efforts for a new and improved video camera!
Jason
Showing posts with label Canon. Show all posts
Wednesday, January 9, 2013
Sunday, January 15, 2012
Shooting Lessons pt. III: Shutter Speed
In my opinion, there are two requirements for a good image/video when it comes to shooting aircraft: proper shutter speed, and great panning. In this lesson I will speak about the first, shutter speed.
First of all, the goal of anybody shooting propeller driven aircraft or helicopters should be to shoot at the slowest shutter speed possible so as to obtain a good amount of prop/rotor blur. A stationary propeller or rotor makes the subject look like it is just a toy, suspended in the air. An image with a full-disc of prop/rotor blur makes the picture pop with energy and excitement and more accurately portrays how the human eye sees it
When shooting propeller-driven aircraft, I suggest shooting absolutely no faster than 1/150 of a second. When I'm out of practice I will still shoot still photos at 1/125, but when I have been out shooting for days on end, I can handhold my 500mm lens down to 1/50 to get a nice, full, disc of prop blur. If your shooting jets you can certainly up the shutter speed, but keep in mind, tracking a fast subject with a completely stopped background is not nearly as exciting as one with a tack-sharp subject and a completely motion blurred background. When shooting jets I tend to keep it around 1/200. That keeps my autofocus happy, and it provides a nice amount of blur. Helicopters are the tricky buggers! Those you absolutely want to shoot as slow as possible, as the main rotor blades move much slower than propellers. Those you want to shoot under 1/100 second when at all possible.
While shooting video I am able to get a good amount of propeller blur when I select a shutter speed of 1/100 second. Sometimes, if I do not have to pan a lot, I will slow it down to 1/60.
Equipment consideration: slow shutter speed may make it more difficult for your cameras autofocus to track the subject! As I hinted above, there are very few times I will slow it down to 1/60 second using my Canon HG20 due to the fact that any slight shaking or movement of the subject will cause the autofocus to get confused.
Enjoy these tips and be sure to comment if you have any questions or need clarification! Eventually I hope to turn these into video tutorials.
First of all, the goal of anybody shooting propeller driven aircraft or helicopters should be to shoot at the slowest shutter speed possible so as to obtain a good amount of prop/rotor blur. A stationary propeller or rotor makes the subject look like it is just a toy, suspended in the air. An image with a full-disc of prop/rotor blur makes the picture pop with energy and excitement and more accurately portrays how the human eye sees it
When shooting propeller-driven aircraft, I suggest shooting absolutely no faster than 1/150 of a second. When I'm out of practice I will still shoot still photos at 1/125, but when I have been out shooting for days on end, I can handhold my 500mm lens down to 1/50 to get a nice, full, disc of prop blur. If your shooting jets you can certainly up the shutter speed, but keep in mind, tracking a fast subject with a completely stopped background is not nearly as exciting as one with a tack-sharp subject and a completely motion blurred background. When shooting jets I tend to keep it around 1/200. That keeps my autofocus happy, and it provides a nice amount of blur. Helicopters are the tricky buggers! Those you absolutely want to shoot as slow as possible, as the main rotor blades move much slower than propellers. Those you want to shoot under 1/100 second when at all possible.
While shooting video I am able to get a good amount of propeller blur when I select a shutter speed of 1/100 second. Sometimes, if I do not have to pan a lot, I will slow it down to 1/60.
Equipment consideration: slow shutter speed may make it more difficult for your cameras autofocus to track the subject! As I hinted above, there are very few times I will slow it down to 1/60 second using my Canon HG20 due to the fact that any slight shaking or movement of the subject will cause the autofocus to get confused.
Enjoy these tips and be sure to comment if you have any questions or need clarification! Eventually I hope to turn these into video tutorials.
Labels:
aircraft,
airplane,
Canon,
film,
flight,
flying,
lens,
motion picture,
nikon,
panning,
photography,
shooting,
shutter speed,
techniques,
tips,
video
Thursday, December 29, 2011
Shooting Lessons pt. II: When in Doubt, Zoom out!!
Now that I have trained myself to wait for my subject to be closer before recording and follow the previous rules, I have yet another bad habit to fix: zooming in too far. I am not quite sure why it is, but for some reason every time I see an aircraft approaching through my viewfinder/screen I zoom all the way in. Once I get home and see the video I am again disappointed that the video quality is less than what I remember when shooting. Just like time compression in my previous post (Norm, you know what I'm talking about!). The plane jumps all around the frame in a blurry mass if metal. Ever been there?
Again, taking notes from my still photography, it took me a while to back off when I first got my Sigma 50-500mm lens. I wanted to be able to see the look on the pilots face as they passed by. Several years later that amusement has warn off for better things such as framing. Same should be done with my video. I need to back it off.
Today, as a matter of fact, I applied this very rule, with very good results. I can't see the pilots faces, but I can see the entire aircraft and its proximity to the ground. This, I believe, makes for a much more pleasing clip. Extreme closeups have their time and place but should be used sparingly.
Just like in still photography, there is an exception. Extreme closeups can be very cool, and add a lot of energy to your video. However, it must be done with great consideration! Here are some rules that I follow with my still photography and am trying to apply to video.
1. Make it look intentional! Clipping just the very end of the nose, tail, or wingtip looks sloppy. If you want it full frame, zoom out a bit. If you want it cropped, zoom in so as your viewer knows you are trying to focus on one particular aspect of the aircraft.
2. Make it look smooth! At least, as smooth as possible. You never know if you don't try, right? Try to find a zoom range that works for you and your equipment and make a mental note for yourself to NEVER go beyond that range. Make a small mark on your camera if you need to.
3. Just like real life pilots, make yourself some personal minimums. Go practice shooting and determine the amount of zoom that you like for those shots you MUST keep in the future. But, be sure that when the moment counts, you don't press your luck and assume you'll be "just fine" this time out. I've ruined too many amazing photo opportunities because of this. Some photographers will tell you to take the risk, I tend to say err on the conservative side. I'd rather have a clip that leaves me wanting more, than one that leaves me wanting less.
Equipment Consideration:
Not all image stabilization is created equal, and none are perfect!
Again, consider your focus points. I know I mentioned this in the last post, but you must be aware of the focus point(s) in the camera you are using. I cannot tell you how many times I wanted have nice 1/3 framing, only to find my camera kept trying to focus on a blank background, which ruined the shot. In this case, what I should have done is zoom out more so I can still keep my subject in the center (focus point) and the ground on the bottom portion of the screen.
I hope these tips help in some way, either in shooting video or still photography! Please comment below and share with your friends!
Blue skies and happy shooting!!
Jason
Today, as a matter of fact, I applied this very rule, with very good results. I can't see the pilots faces, but I can see the entire aircraft and its proximity to the ground. This, I believe, makes for a much more pleasing clip. Extreme closeups have their time and place but should be used sparingly.
Just like in still photography, there is an exception. Extreme closeups can be very cool, and add a lot of energy to your video. However, it must be done with great consideration! Here are some rules that I follow with my still photography and am trying to apply to video.
1. Make it look intentional! Clipping just the very end of the nose, tail, or wingtip looks sloppy. If you want it full frame, zoom out a bit. If you want it cropped, zoom in so as your viewer knows you are trying to focus on one particular aspect of the aircraft.
2. Make it look smooth! At least, as smooth as possible. You never know if you don't try, right? Try to find a zoom range that works for you and your equipment and make a mental note for yourself to NEVER go beyond that range. Make a small mark on your camera if you need to.
3. Just like real life pilots, make yourself some personal minimums. Go practice shooting and determine the amount of zoom that you like for those shots you MUST keep in the future. But, be sure that when the moment counts, you don't press your luck and assume you'll be "just fine" this time out. I've ruined too many amazing photo opportunities because of this. Some photographers will tell you to take the risk, I tend to say err on the conservative side. I'd rather have a clip that leaves me wanting more, than one that leaves me wanting less.
Equipment Consideration:
Not all image stabilization is created equal, and none are perfect!
Again, consider your focus points. I know I mentioned this in the last post, but you must be aware of the focus point(s) in the camera you are using. I cannot tell you how many times I wanted have nice 1/3 framing, only to find my camera kept trying to focus on a blank background, which ruined the shot. In this case, what I should have done is zoom out more so I can still keep my subject in the center (focus point) and the ground on the bottom portion of the screen.
I hope these tips help in some way, either in shooting video or still photography! Please comment below and share with your friends!
Blue skies and happy shooting!!
Jason
Monday, December 19, 2011
Shooting Lessons: Pt. I - Patience
This lesson is about patience, waiting for that perfect moment to start recording your video.
I'm finding that learning to shoot video is much the same as learning to shoot still photographs. Though I have been photographing airplanes for ten years now, I feel as though I'm starting from the beginning when it comes to video. A perfect example of this is wanting to shoot everything I see, even when the aircraft/subject is waaaaaay off in the distance. To the naked eye it "looks cool" and sometimes even through the view-finder/display screen it may look especially cool, since I can zoom in on the subject. However, once I get home and sit down at the computer and review it, I realize I wasted 40 seconds of video which I could have used later in the day, on a subject I can hardly even see.
Lesson I - Patience: Only shoot when your subject can fill 1/3 of the frame or more.
Think of each clip you shoot as an individual photograph. Would you want to sit and look at a speck of an airplane against a solid blue sky for 30-seconds? Probably not. Once that aircraft/subject fills at least 1/3 of the frame, you will be able to make out greater detail.
The other thing to take into consideration is that you will probably be at full zoom. As we all know, trying to keep any camera rock-steady at full zoom is very, very difficult. As a result, this video will be very shaky. That is, unless, you have a nice tripod setup. In that case, I find it even more tempting to record when the subject is far away. Remember to be patient, and keep your finger off the trigger until you can get a decent, interesting shot.
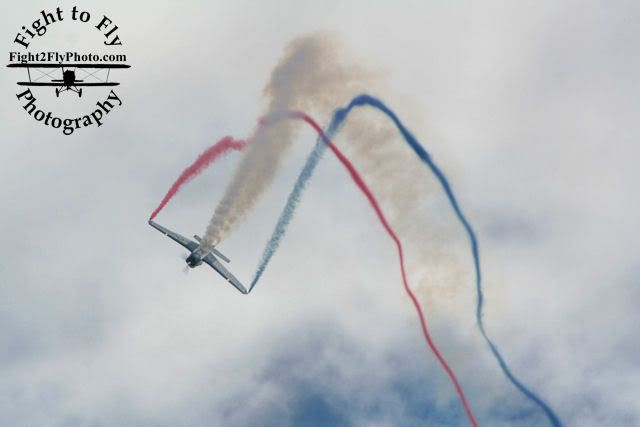
With every rule of photography there is an exception. With this, the exception would be if you're trying to catch an interesting background or you're trying to capture the motion of the subject. If you're at an airshow you may want to show an aircraft making an exceptionally tight turn, or rounding off the top of a loop or other aerobatic maneuver. If you're at an airport spotting, you may want to show aircraft in the traffic pattern turning base to final. For this to be successful, in my opinion, you must have a background other than solid blue sky. Clouds, ground references, or maybe even airshow smoke must be visible to show motion. This follows a lesson I will discuss at a later time, when in doubt, zoom out.
Equipment Consideration: Focus point
With my Canon VIXIA HG20 I find it extremely challenging to record an interesting scene due to the fact this camera only has one focus point, and it is dead center. As a result, this unfortunately means most of the time I cannot follow the rule of thirds. If I want the subject in focus, it has to be in the middle. Otherwise I get continuous focus searching, or a blurry subject. If you have an older piece of equipment or one with limited functions, be aware of that and shoot accordingly. Sure, in PP I can zoom and pan the scene, but this will result in a generally degraded image quality due to pixelation and increased noise.
I'm finding that learning to shoot video is much the same as learning to shoot still photographs. Though I have been photographing airplanes for ten years now, I feel as though I'm starting from the beginning when it comes to video. A perfect example of this is wanting to shoot everything I see, even when the aircraft/subject is waaaaaay off in the distance. To the naked eye it "looks cool" and sometimes even through the view-finder/display screen it may look especially cool, since I can zoom in on the subject. However, once I get home and sit down at the computer and review it, I realize I wasted 40 seconds of video which I could have used later in the day, on a subject I can hardly even see.
Lesson I - Patience: Only shoot when your subject can fill 1/3 of the frame or more.
Think of each clip you shoot as an individual photograph. Would you want to sit and look at a speck of an airplane against a solid blue sky for 30-seconds? Probably not. Once that aircraft/subject fills at least 1/3 of the frame, you will be able to make out greater detail.
The other thing to take into consideration is that you will probably be at full zoom. As we all know, trying to keep any camera rock-steady at full zoom is very, very difficult. As a result, this video will be very shaky. That is, unless, you have a nice tripod setup. In that case, I find it even more tempting to record when the subject is far away. Remember to be patient, and keep your finger off the trigger until you can get a decent, interesting shot.
With every rule of photography there is an exception. With this, the exception would be if you're trying to catch an interesting background or you're trying to capture the motion of the subject. If you're at an airshow you may want to show an aircraft making an exceptionally tight turn, or rounding off the top of a loop or other aerobatic maneuver. If you're at an airport spotting, you may want to show aircraft in the traffic pattern turning base to final. For this to be successful, in my opinion, you must have a background other than solid blue sky. Clouds, ground references, or maybe even airshow smoke must be visible to show motion. This follows a lesson I will discuss at a later time, when in doubt, zoom out.
Equipment Consideration: Focus point
With my Canon VIXIA HG20 I find it extremely challenging to record an interesting scene due to the fact this camera only has one focus point, and it is dead center. As a result, this unfortunately means most of the time I cannot follow the rule of thirds. If I want the subject in focus, it has to be in the middle. Otherwise I get continuous focus searching, or a blurry subject. If you have an older piece of equipment or one with limited functions, be aware of that and shoot accordingly. Sure, in PP I can zoom and pan the scene, but this will result in a generally degraded image quality due to pixelation and increased noise.
Wednesday, December 14, 2011
Summer Projects: Luftwaffe Day
Back in August my Sigma 50-500mm lens started having aperture problems, where it would just stay closed. At first it would happen only occasionally, starting in July, but by the time "Luftwaffe Day" had approached, which was due to be Flying Heritage Collection's debut of the worlds ONLY airworthy Focke-Wulf 190A-5, I figured I better be ready for a backup plan and decided to bring my Canon camcorder along.
As I feared, the lens never recovered that morning, and I was forced to start shooting video.
This is the video that I shot that morning and thus began my conversion to shooting video exclusively:
This day represented the first time an original Fw-190 and an original Bf-109 had been in the air together since WWII. The Fw-190 was piloted by Steve Hinton, and the 109 by Bud Granley. Sitting behind me in a hangar was Legend Flyers Messerschmitt Me-262 which they had been test flying earlier that week.
Enjoy!
As I feared, the lens never recovered that morning, and I was forced to start shooting video.
This is the video that I shot that morning and thus began my conversion to shooting video exclusively:
This day represented the first time an original Fw-190 and an original Bf-109 had been in the air together since WWII. The Fw-190 was piloted by Steve Hinton, and the 109 by Bud Granley. Sitting behind me in a hangar was Legend Flyers Messerschmitt Me-262 which they had been test flying earlier that week.
Enjoy!
Labels:
Bf-109,
camcorder,
Canon,
FHC,
Flying Heritage Collection,
Focke-Wulf,
Fw-190,
Luftwaffe,
Messerschmitt,
video,
VIXIA,
WWII
Monday, July 16, 2007
Arlington EAA Fly-In.
The Arlington Fly-In proved to be another great show for 2007. Arriving only for the Sunday show, I was greatly surprised as to the lack of attendance. There were very few aircraft as most pilots moved out earlier in the day. When it comes to photography, I couldn't ask for a better situation! No heads in the way at all!
The airshow lineup included local legends Bud and Ross Granley performing their formation routine, Julie Clark and her T-34, warbirds including the P-51 Mustang, P-47 Thunderbolt, and A-1 Skyraider. One act I saw for the first time this weekend was Red Eagle Air Sports. They are a two-ship formation aerobatic team who dazzles crowds in their Christine Eagles. The rest of the show included Kathy Hirtz, Eric Hansen, John Mrazek, Renny Price, Dr. Frank Donnelly, Ken Fowler, and Dan Buchanan.
I'm quite bummed that I am only able to watch Bud Granley fly twice this summer. Unfortunately both the Abbotsford International Airshow and Oregon International Airshow are booked on the same weekend. Due to costs and other factors I will be down in Oregon while Bud flys up in Canada.
As far as photography goes, conditions were absolutly perfect! The sky was partially sunny which provided a great background for pictures. As I mentioned in a previous blog, I really don't like having a plain blue background.
Sunday seemed to be an "off" day for me, though. Out of 1,300 pictures I only kept around 300. I intentionally used a slower shutter speed on most of the pics which meant fewer keepers. This is when I really wish I had a lens with IS!! The steady 15 kt wind didn't help matters either, as the large lens on the Sigma 50-500mm acts like a sail in the wind.
Overall I'm still satisfied with the outcome as it was good practice for the upcoming shows I will be attending when people will actually be paying for my services.
To see more great pictures from this show, please view my online gallery by clicking here.
Labels:
aerobatics,
airshow,
arlington,
Canon,
flight,
Fly-In,
flying,
Granley,
Julie Clark,
Mustang,
P-47,
P-51,
photography,
Renny Price,
Sigma,
T-34,
Thunderbolt,
Warbirds
Subscribe to:
Posts (Atom)