Saturday, September 22, 2007

Aerobatics Flight II: Slow Roll, Immeman, in/outside Humpty, 2 Pt roll, Inverted Flight


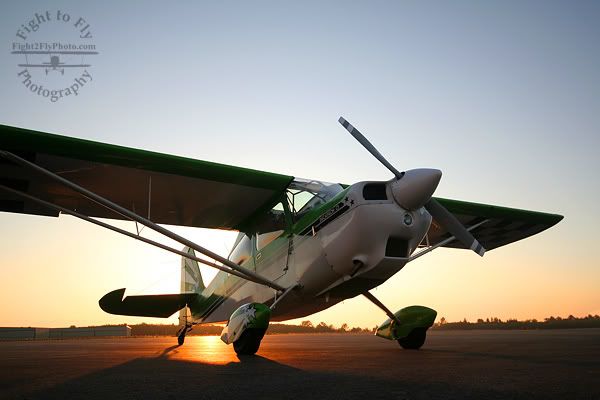
Well, today I had my second flight! And boy was it fun! We reviewed the maneuvers we did on the first flight (loop, spins, aileron roll, and inverted flight) then added a few more: Slow Roll, 2-pt roll, Immelman, and Inside/Outside Humpty-Bump.

The slow roll really has a deceiving name. Speed has nothing to do with the maneuver as it still requires full stick deflection and maximum roll rate. The aileron roll actually traces a corkscrew through the sky, where the slow roll is supposed to be axial. This means the airplane is supposed to maintain constant altitude and heading throughout the maneuver, rotating only along a single axis (longitudinal). The challenge is that it requires precise coordination between all flight controls. Throughout the maneuver your feet are moving constantly to adjust to the rapidly changing roll attitude, and the stick adjusts to keep the nose on the horizon while inverted. It is somewhat disorienting at first as your body gets slammed to the left, then straight up out of the seat, then right, then you settle back down in your seat at the end. (for a roll to the left, of course) It can leave you a little confused at the end. Well, I should say that I could see how that would be possible. It didn't confuse me but I'm a roller coaster junkie and I can't get thrown around enough!

Execution: Start this maneuver at the same speed as the aileron roll, 120 mph. Then simply apply full aileron deflection in the direction you want to roll (for this example it will be a roll to the left). As you move the stick you actually want a little bit of left rudder, but as soon as you've reached the stop start feeding in right rudder. As your wings approach the 90 degree point you'll be feeding in gradually more "top" rudder to maintain attitude and altitude. But beware, too much right rudder and your roll rate will quickly decrease! It is quite noticeable as it is almost as if someone put the brakes on your roll rate. Due to adverse yaw you will find you don't need very much right rudder... much less than the later portion of the maneuver. At the 90 degree bank point you should reach maximum rudder required for the roll then begin to gradually release this pressure on the right pedal as you continue on to inverted. As you pass 90 degrees of bank now you need to start feeding in forward stick. You really need a lot of forward stick for this maneuver, much more than what you may think you need. As you pass the 180 degree mark you'll want to make sure to keep in a good bit of forward stick to help maintain altitude for the maneuver and also begin to add in "top" rudder (left now). When you are at the 270 degree point your rudder input should be at its maximum necessary to maintain attitude and altitude and begin to decrease it once beyond 270 degree point. Again, you will need more left rudder in this maneuver than right. If you have difficulties maintaining altitude/attitude on this maneuver it is most likely due to the inverted portion and beyond. It's a good idea to practice 2 pt. rolls and inverted flight to get a solid picture of where the nose needs to be in relation to the horizon. For the Decathlon there is a very significant difference between where the horizon is in the windscreen for upright and inverted flight.

The biggest problem I was having with this maneuver was putting in the correct amount of right rudder (I always had a lead foot on it and the roll rate would decrease) along with too little forward stick for the inverted portions. Another problem some people experience is relaxing the roll rate. It is important that you remember to keep that stick all the way to the left or right depending upon the direction of course.

The Immelman is simply a half-loop followed immediately by a slow roll to upright. It's quite challenging as you end the maneuver upright only slightly above stall speed. The pull up to the top of the loop really slows the plane down a lot. We start this one at 160mph and ends right on the 55mph mark. I've always been curious as to what the difference is between the immelman and just a half loop. The loop and roll portion of the Immelman is designed to be one fluid maneuver. There is to be no horizontal hesitation between finishing the looping portion and initiating the rolling portion. With the half loop you are supposed to have a hesitation in the inverted position before you initiate the 1/2 roll to upright.

Execution: Initiating this maneuver is the same as the loop except with about 10 extra mph on the airspeed at the beginning. You begin with an abrupt pull (around 4 G's) to raise the nose above the horizon. Just like the loop you look out the front until the horizon disappears behind the instrument panel then shift your scan to the left wingtip. Keep watching out the left window until you reach approximately 45 degrees nose high inverted. Then you begin to look out the top of the aircraft at the horizon as you simultaneously begin a 1/2 slow roll to upright. You want to start the roll at this point because the airplane is flying extremely slow and it takes a lot of energy to swing the airplane around 180 degrees without sinking out of the top. For this left hand roll you will need nearly full left rudder to keep that nose from dropping below the horizon and you'll also have to work that elevator as well to keep the nose moving in the same plane. Once all is said and done and the wings are level the aircraft will be just on the verge of stall. When I did these the first times (and actually did it correctly I might add) the airspeed indicator was showing 60 mph as soon as the wings were level again. From here it is important that you keep that nose up so you do not descend. It's similar in principle to a chandelle because your pitch attitude will be quite high as you accelerate.

The only problems I had with this were due to the timing of that roll and knowing how much rudder I needed. Here you need to start the roll well before you would think it should be started.

The Humpty-Bump is almost as fun to say as it is to fly! It is a vertical maneuver where you perform a 1/4 loop to vertical, hesitate a few brief moments, then abruptly apply aft stick and ride it around until you perform 1/2 of a loop so the nose is pointed straight down again. Since the airplane was going vertical the speed drops very quickly and the actual rotation part of the maneuver is just on the edge of stall. The top is not really a high-g maneuver... probably just about 3 or so, but it's sure fun to see that horizon come around so fast! The recovery at the end is another significant 1/4 loop pull to level. On this maneuver the judges are not looking for constant radius on the 1/4 loops. But they are looking for constant radius 1/2 loop over the top.

The other version of the humpty has you push the nose over the top instead of pull. During that part you literally get thrown straight up out of your seat and your full weight (and then some) is on the harnesses. I'm finding the difficult part of these negative-g maneuvers is keeping constant stick position and my feet on the pedals. No matter how tight the harness is, your body still moves which translates to the stick moving as well. So this can be a challenge on certain maneuvers.

This maneuver is one that I need to pay special attention to as it may cause "gray-out" and lead to disorientation. During the negative g part of the maneuver your blood pools in your head, then you abruptly pull a high positive -g recovery causing all that blood go back into the lower portion of your body. Once blood starts to leave the brain one of the first symptoms is reduction in vision thus the gray out.

Execution: This maneuver will also require a little extra speed on entry due to the hesitation in the vertical position. We fly this at about 160mph as well. You begin with a significant pull to vertical, perhaps even more aggressive than a regular loop. As you watch out the left window after the horizon is no longer visible out the front, you wait for the wing to become perpendicular to the horizon. Once it does you want to apply aggressive forward stick to stop all pitch movement and make a nice, crisp vertical hesitation. The hesitation is very slight in this aircraft and shouldn't even reach 2 seconds. After you wait that brief moment you want to haul back on the stick to pitch that nose right around to swap ends. The airplane is going to be very slow at this point and you want to make sure not to stall the aircraft. Each time I performed it I could feel significant buffeting on the controls throughout the entire 180 degree pitch. This part happens really fast and once the horizon is visible out the front you want to be sure to aggressively apply forward stick at the 90 degree point as your nose is pointed toward the ground. The other thing you need to be aware of is the fact the nose will actually want to yaw as you pitch over the top. Due to gyroscopic precession the nose will want to swing to the right, which will require a slight bit of left rudder. How much you may ask? However much is necessary. After doing it several times you'll get a feel for it (or so I'm told) Make sure to stop all aircraft movement at this time, hesitate a few brief moments, then recover as you would from the backside of a loop. Again, you don't want to hesitate too long as you will be accelerating extremely quickly. This portion should be right at 0-G's since you're headed straight toward the earth. From the cockpit, however, it will feel as negative. That's because the human body is only used to positive G's.

The outside version of this maneuver is just the same thing only reversed. You really need to pitch that nose forward a lot and feed in some serious forward stick. And since it is pitching the nose down you will want to feed in right rudder.

Want an easy way to remember which way the nose will yaw when pitching up? Think of the word "upright." That means when the nose pitches up, it will want to yaw to the right. And if you remember that, you can surely remember the opposite is true as well. Oh yeah, and that rule only applies to North American airplanes. Ones such as Yak's and Sukhoi's will be opposite since their propellers rotate counter clockwise.

So there you have it, flight number two! And now I have to wait until October 15th when my instructor gets back from a business trip to London.

Friday, September 14, 2007

Pure Magic! First aerobatic training flight


This is the airplane I'm training in, taken yesterday after my first aerobatic training flight! Beautiful airplane, isn't it?

Wow, there isn't a word in any language that can appropriately describe what that first flight was like. I've imagined that first experience countless times before in my head and none of them matching how incredible it was in real life.
From the beginning:

Matt arrived at the airport and we went up to one of the flight school offices to discuss what we would be doing for this first flight. He went over each maneuver we would do which included steep turns, slow flight, rudder turns (more on this later) falling leaf, stalls, spins, aileron rolls, and loops. He went through each maneuver describing power settings control inputs, what and where to look, and what it might feel like. I personally have read several books on the topic of aerobatics and everything he said echoed what I had already heard--which is a good thing! I'm not one who likes surprises, especially in the air!

After that was all said and done, we went out to the airplane and he briefed me on wearing the parachute and how to operate it in an emergency. He also briefed me on the harness system, door hing release mechanism and when to use them. (only when the airplane is physically unable to be controlled, IE. wing falls off) I felt he was very thorough. I've had experience wearing parachutes before when I worked at Harvey Airfield. I was able to go up in a Cessna Caravan for skydive flights and was required to wear a 'chute even though I was riding with the pilot.

Inside the plane- All strapped in and ready to go! Since I don't have my tail wheel endorsement and have very little experience in them all together he did the takeoff and landing but let me do the taxiing. The nice thing about the Decathlon is the fact you can actually see over the nose while taxiing, so it wasn't too difficult. Takeoff was quick and smooth and we were on our way up to 3,500 feet!

Upon reaching our intended altitude I started things off by doing some steep turns to the left and then to the right. Again this just gets me used to all the controls in the airplane, and gets my head "outside" the cockpit, looking for traffic and again, getting used to how things look from this airplane. My first turn was to the right and that was fine, but when I did my turn to the left, I found myself always wanting to descend. I realized about half way through that I didn't have to compensate for sitting in the left hand seat! In a Cessna the sight picture for a left steep turn is much different from that of a right hand steep turn because the seating is side-by-side. So I fixed that problem and all was well.

Then we slowed things down a bit and learned how the airplane felt in the backside of the envelope. The airplane was still very responsive and quite pleasant. One thing I began to notice at about this point is my right leg, for who-knows what reason, would tense up and would start pressing on the right rudder pedal. Every time I noticed this I'd relax it and continue what I was doing. After a while this went away. It was odd because at no time during the flight was I really anxious or nervous. Throughout the flight I made a conscious effort to keep a gentle grip on the controls. I've learned through personal experience in my flying that a tight grip on the controls leads to over-correction and sloppy flying. From what I've read that problem is multiplied when one performs aerobatics.

Rudder turns. This maneuver was simply to get me used to playing with the rudder and to show how much it authority it has on the airplane. We cruised around at about 90 mph and then I simply smoothly applied right rudder. Instantly the airplane wants to roll to the right, but part of the exorcise is to keep the wings level. So that required left stick. I was quite shocked to see just how much aileron deflection it required to keep the wings level while performing this 360 degree "flat" turn. I did this both to the left and the right.

Next up, stalls! Now I did several power on and power off stalls. For those unfamiliar with aviation terms, power on and power off simply refers to how much power is applied during the maneuver. Power off simply has the throttle at idle or near-idle power. Power on, for this flight, was just about 1,800 RPM. I got to see how the aircraft reacts to stalls and how to recover them. Again, it gradually gets me used to unusual attitudes and how the airplane reacts in different situations. Recovery is really simple, just move the stick forward and use the rudder to keep the wings level and the airplane coordinated.

Falling Leaf. This is a maneuver where the goal is actually to keep the airplane in a stall and control it with the rudder. On this flight we couldn't really get the airplane to stay in a stalled condition, but I was still able to get a good idea of how the airplane reacts to rudder inputs.

Now the fun begins: Spins! I had only been in one spin before this flight and it was a demonstration in a Cessna 150 about seven years ago. All I remembered about it was the fact it was freakin' fun! I was kind of anxious as to how I'd feel about doing these spins. Matt did one first, walking me through the process. Then he had me talk him through what I was going to do and then it was up to me. Prior to doing this myself the first time I still felt a bit weird about spinning an airplane, intentionally. For all my life I've been trying to avoid these! But, nonetheless, I slowed the airplane down, power to idle, kept bringing the stick back, slower, slower, stall horn goes off, full left rudder, full aft stick, and around I went!! Then after about 1 rotation I applied full right rudder, forward stick, spinning stopped, stall stopped, then recovered to level flight and added power to climb back up and do it again! As soon as the airplane was "flying" again I thought to myself, "That was freakin' awesome! Lets go again!" So then I did one to the right, and was quite surprised at how much faster the airplane rotates when doing a spin to the right! My instructor seemed to be impressed with the fact I was recovering from these spins on almost the same heading as when I began them. After about the second spin I had done myself I was able to sit there and count the turns in my head and know where I was in the spin. After doing several 1 and 1.5 turn spins Matt had me go beyond that to 2 and 3 turn spins. Again this was much different as at takes about 1.5-2 turns for the airplane to settle into the spin. For that early phase the rotation actually accelerates and then stabilizes in turns 2 and beyond. We did one 5 turn spin to test the theory of whether the airplane would actually recover itself from the spin, which, it did not. It may have to do with a further aft CG, and also some take longer to recover than others. But it didn't seem like the airplane was willing to help out as that stick was pressed firmly all the way back. This was the only time I felt weird during the flight but it was only dizziness from spinning around so fast. It wasn't nearly to the point of being disorienting and I was still able to control the aircraft just fine.

Rolls! After I got my fill of spins for this first flight, we moved on to aileron rolls. These were so much fun! Nothing like seeing that horizon rotate right in front of you! Doing these was pretty simple, pitch the nose down to reach 120mph, pitch up about 30 degrees, then simultaneously move the stick all the way over to one side while applying rudder in the same direction. Rudder only really needs to be applied during the first and last portions of the maneuver, but I seemed to have kept it in throughout the entire thing. Just as you begin to reach inverted it's also a good thing to add a bit of forward stick, causing you to rise up out of the seat momentarily and continue on to finish the maneuver. For a lot of these I was actually able to finish the maneuver right where I began. But there were still a few that seemed kind of odd due to inaccurate rudder use.

After having done about a dozen of those in either direction we moved on to loops. Now this was a blast too! (I know, I say that after everything) I couldn't believe how 4 g's felt when doing this! It was awesome! We pitched the nose down pretty good, then abruptly bring the stick back into our laps to pitch the nose up nice and fast. For the first little bit of the loop you look out the front, then once the horizon is no longer visible you shift your scan to watch the horizon dance around the left wingtip. This is the only real way to know where you are in the loop. Then once you are about 45 degrees inverted above the horizon you ease the pull and push the stick forward a bit to float over the top and lift out of the seat for a moment. At this point you tilt your head back and look out the top of the aircraft to watch the horizon and finish out the maneuver with another significant pull to level. For these I seemed to be a bit timid on the initial pull and the float over the top needs some work. But hey, it's my first flight! :) I need some reason to come back, right? (Ha! like I need a reason! I'm addicted!)

After doing several more of those, and some more aileron rolls I asked to do some inverted flight, just for fun. This was quite awesome. It was simply a two point aileron roll. I was surprised at how much forward stick was required to keep the airplane flying level, and to be honest, it didn't feel that bad! (I say this with ignorance because that was only -1G. I'm quite certain my opinion will change once I get anywhere beyond -1G!)

So, after that we landed, had a very brief debriefing and that was that! My first aerobatic flight under my belt! For the next flight we're going to do steep lazy-8's (wing overs basically), more spins, aileron rolls, loops, and the practice some 2 point rolls and some unusual attitude recovery exorcises.

Wednesday, September 12, 2007

Tomorrow I start my aerobatic training!

I'm scheduled to go up with Matt at 4:30 tomorrow. We'll start with a pretty thurough preflight briefing going over the maneuvers and procedures. Once airborne we'll do some steep turns, slow flight and stalls just to get me used to how the airplane feels in different conditions. Once I begin to get used to things we will move on to spins in both directions. We'll finish up with a couple simple aerobatic maneuvers such as the aileron roll and loop. For the purposes of this flight these maneuvers will simply be to acclimate myself to the unusual attitude of aerobatic flying and the G-forces I'll be experiencing throughout the training.

Monday, September 10, 2007

Today's meeting with my new instructor...

Today I had a nice meeting with my aerobatic instructor, Matt Groth of Northwest Aerobatics (In association with Northwest Aviation Center). He showed me the airplane and gave a nice overview of the aircraft, its systems, and the things that make it unique as an aerobatic aircraft. He flys a beautiful green and white Bellanca Decathlon CS complete with smoke system. I got to sit in the cockpit for a little while and must say I'm quite impressed with the forward visibility! Unlike most other tail-draggers, you can actually see the ground out of the front of the aircraft while taxiing.

Matt seems like a pretty cool guy and sounds like a very pleasant instructor to have. It will certainly be a good change of pace considering my past luck with instructors. (I've gone through 15, Matt is lucky number 16!)

Sunday, September 9, 2007

Finally, I get to do what I want!

I'll be turning 24 this coming Friday and all I have ever wanted to do since I could speak was to fly upside down, and every which way possible... that is, every way but straight and level. The last few years have slowly worn me down as I was beginning to think this would never be possible. I've searched high and low to try and find a place that teaches aerobatics and have had no success. At least that would not require moving.

As an act of Divine Intervention this last week I discovered that there is a fellow who flys out of Paine Field (where I work) who recently started his own aerobatic flight school, Northwest Aerobatics. Last thursday I got a copy of his syllabus, and have since communicated with the instructor about starting training ASAP.

FINALLY! We're going to meet on Monday to answer some more of my questions and figure out when to start my training. Hopefully it will begin either later this week or early next week. He has an 8 flight syllabus in his Decathlon which will walk me through all of the basic aerobatic maneuvers including aileron rolls, loops, hammerheads, spins, hesitation rolls and cuban-8's among a few others.

My dream has finally come true! All I ever wanted is a chance to prove my mettle and show that I really do have what it takes to be an airshow pilot.

I'll finally be flying airplanes in the way they're truly meant to fly... FREELY! No restraints. I'll be able to fly upside down, loop, and do whatever the airplane can take.

My long term goal is to start competing in aerobatics to build my skills and confidence that will allow me to one day fly at airshows in order to inspire others.

So, screw the boredom of flying straight and level, using autopilot and those whimpy 45 degree banked "steep" turns!!!

Saturday, September 1, 2007

Airshow Photography Tips Part I

What's my number one piece of advice when it comes to catching great photographs at airshows? Know what is going to happen ahead of time.

This can be done several different ways. One of the easiest is simply to carry a radio scanner with you that allows you to listen to the tower controllers. This may not be as good as a discrete frequency or airboss' frequency, but still gives you a good 5-10 minute heads up as to where airplanes will be approaching from, what type of airplane, and the time to expect it. Example: At the Oregon International Airshow there were three aircraft fly-by's that took place on the two show dates: the F-117, F-15, and KC-135. Because I had a scanner I was able to know where and when each aircraft would be approaching the showline a good 5-10 minutes before it was announced over the PA. This gives you plenty of time to adjust camera settings, ensure you have enough film/memory for the passes, and prepare yourself for the types of pictures you want to get.


Another way you can do this is to simply familiarize yourself with airshow rutines such as the US Navy Blue Angels or USAF Thunderbirds. Both teams perform the same maneuvers in the same order each year which gives you a chance to plan ahead of time. This will make your shots much more consistant and also gives you plenty of time to setup your shot properly.


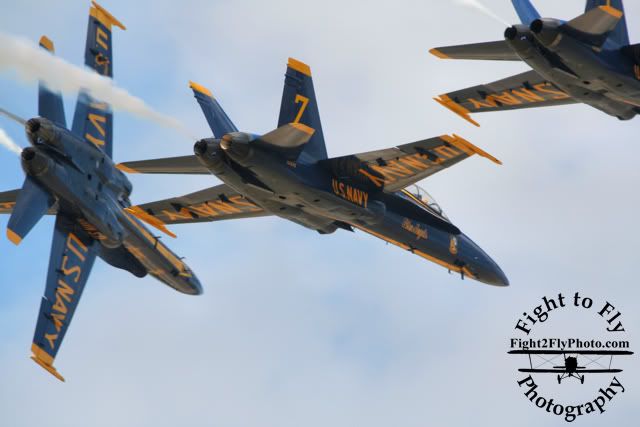
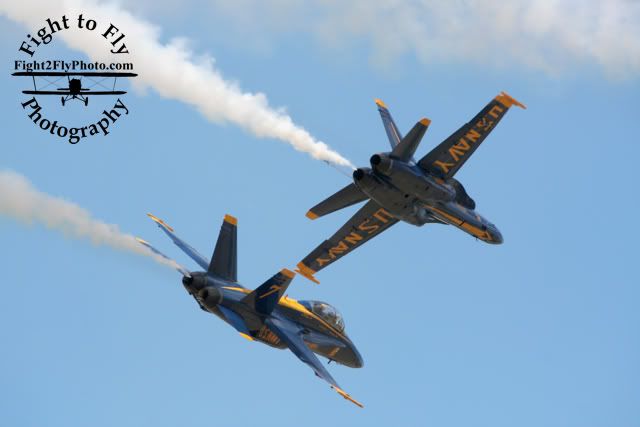
The picture above shows what is a very dynamic maneuver flown by the Blue Angels. Due to the formation and the way it is setup the apperance changes drastically to the observer on the ground.

This picture of a maneuver called, "The Fortus," is also easily achievable due to prior knowlege.

This is one of the most difficult pictures to capture at a Blue Angels show as the Diamond formation comes from directly behind the crowd. Depending upon your location at the airshow and how show center is arranged for the Blue Angles, the wingmen break formation either directly over the crowd or just in front as shown in this picture. To capture this picture I had my camera already aimed approximately where I thought the formation would fly as tracking them going directly overhead is extremely difficult. Especially with a heavy lens. Once the jets were in the viewfinder I began snapping pictures, and this was the first one off in a burst of about 5.

The following was the third shot in the same burst.


That's it for now! I hope this tip is able to help you out at your next airshow outting. I'll be explaining more tips and tricks in the weeks and months to come. I will be re-writing and editing these posts in a seperate document as part of my new book. Consider these my extremely rough, rough drafts. :)